 Tweet
Tweet
Quick Links
If you have ever watched a fresh Windows 11 instance downloading update after update right after installation, you should understand how much annoying and time-consuming it can be. After all, Microsoft releases cumulative updates every month for its operating systems, which means even the freshly-downloaded ISO image for Windows is already old. Each time you deploy it, the target computer — be it one of the best laptops or your RGB-laden best gaming PC — then needs to download the latest updates on its own.
Fortunately, there are several solutions that will ensure a new machine is completely patched before the end user even boots it for the first time. For instance, Microsoft’s Visual Studio and Volume Licensing Service Center subscribers can easily get their hands on monthly refreshed Windows ISOs. Having said that, not only those releases are compiled against the regular monthly cumulative update published on that corresponding month’s Patch Tuesday (which means absolutely zero possibility to deploy “C”/”D” preview or out-of-band releases), you have to pay a huge amount of money in the form of subscription fee just to download them.
What is slipstreaming
Power users often resort to UUP dump to get things done, but it makes no sense for someone who already has a Windows 11 ISO downloaded from the public download portal of Microsoft. Rather, it would be better to integrate all the latest available updates into the existing ISO beforehand to cut down the post-installation spinning circle saga. Behold, this isn’t just a theory, as the process exists and is known as slipstreaming.
Cherry on top: You can seamlessly follow the releases through our dedicated Windows 11 update tracker, so dipping your toe into the domain of slipstreaming isn’t a very difficult job, even for a beginner.
How to slipstream updates into Windows 11 ISO
This guide will teach you how to add the latest cumulative updates to the Windows installation media so that you don’t need to check for updates on each computer each time you make a fresh installation. Perform the process once or twice a month and compile your own up-to-date Windows setup package without spending a dime.
As mentioned earlier, slipstreaming proves to be very beneficial in a situation where you need to install Windows and its updates on multiple computers/VMs. However, the initial preparation phase could be quite overwhelming if you have a low-end PC. Turning off your antivirus/anti-malware solution during the integration process will greatly speed things up.
You need to execute a number of task sequences to add new Windows update(s) to an existing ISO image file. No need to worry, though, as we have broken down the process into several easy-to-follow steps. If you have performed the whole thing a few times, it will soon become pretty straightforward to repeat the process in the future.
- Download the latest Windows 11 ISO from Microsoft’s website.
- As of the first week of December 2023, Windows 11 2023 Update version 23H2 (22631.2428) is the latest ISO release published by Microsoft for non-Visual Studio/VLSC subscribers.
- While you can use the ISO produced by the Media Creation Tool too, the program can’t produce images with a verifiable hash due to randomness, so we recommend the standard ISO release over MCT outputs. Moreover, it compresses the underlying Windows Image file (install.wim) to a less-serviceable format called ESD (install.esd), which means you have to expand it anyway.
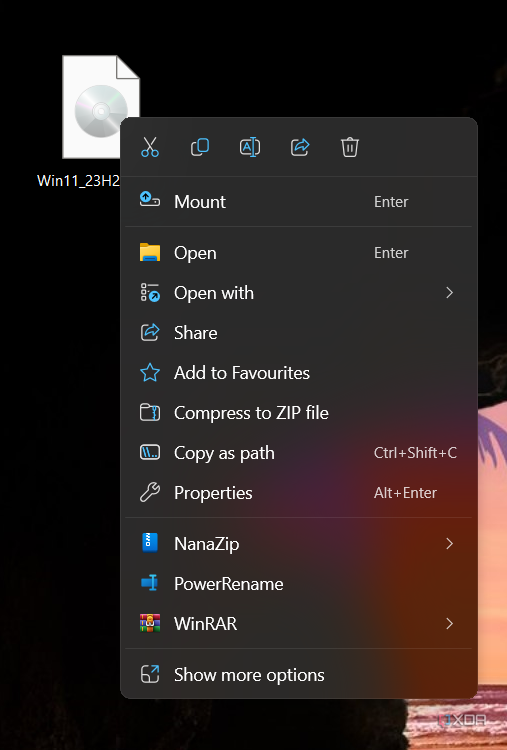
- Double click on the ISO (or right click and choose Mount) to mount the ISO to a drive letter so that your computer treats it as a physical media.
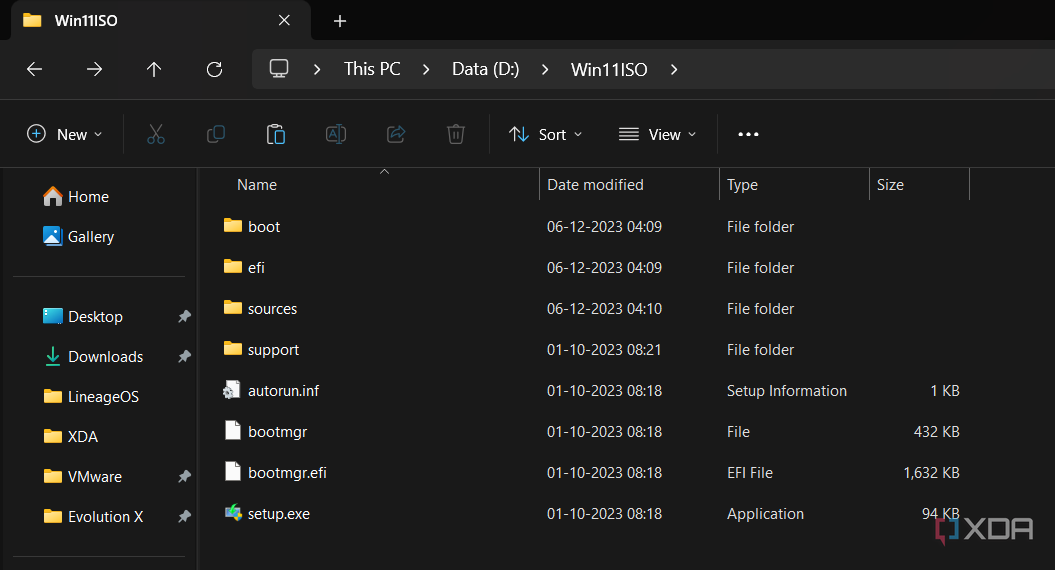
- Copy the contents of the ISO to a folder with a relatively short path, e.g. D:Win11ISO.
- You can skip the first two steps if you have already created a bootable Windows USB flash drive out of the ISO. Be that as it may, always perform the slipstreaming process on an internal SSD to avoid possible bottlenecks.
- Next, download the latest Windows Update .msu (or .cab) packages.
- Apart from XDA’s own Windows 11 update tracker, you can also download the update releases from the Microsoft Update Catalog website.
- It is possible to integrate the .NET Framework updates alongside the monthly cumulative updates for the OS itself.
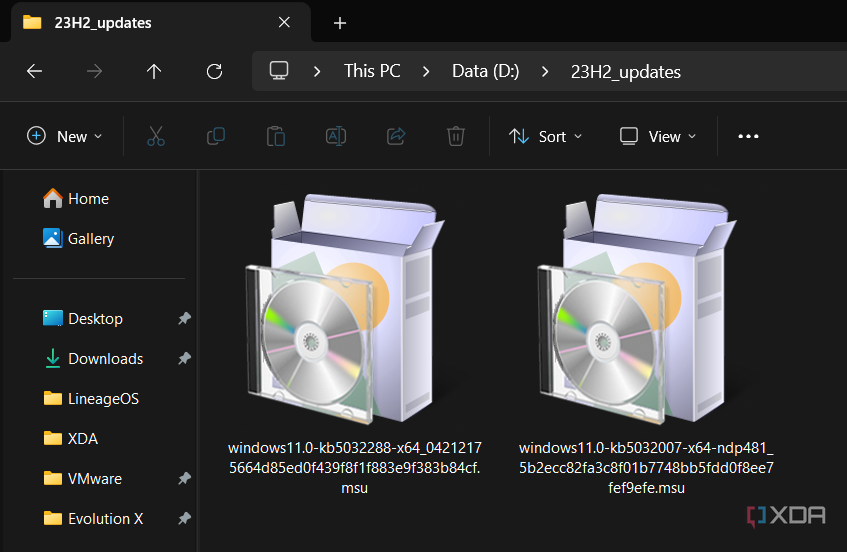
- Move the downloaded update packages to a different folder other than your default download location. Let’s say the folder is D:23H2_updates.
- For this tutorial, we have downloaded the November’s optional, non-security preview update for Windows 11 23H2 (KB5032288 || 22631.2792) and November’s regular cumulative update for .NET Framework 3.5 and 4.8.1 (KB5032007 || 10.0.9206.1).
- There is absolutely no need to download any of the older cumulative or security updates, as the latest ones already include all previous fixes.
- In some cases, you might need to unblock the downloaded update packages for processing. To do this, right-click on the MSU/CAB file(s) and click on Properties. Now check the box next to Unblock and then click Ok.
- For this tutorial, we have downloaded the November’s optional, non-security preview update for Windows 11 23H2 (KB5032288 || 22631.2792) and November’s regular cumulative update for .NET Framework 3.5 and 4.8.1 (KB5032007 || 10.0.9206.1).
- Press the Windows + X key combo on your keyboard and select Terminal (Admin) to launch an elevated shell window. You may also use PowerShell or Command Prompt with elevated privileges if you prefer.
.jpg)
- Now we are going to use a built-in command-line tool of Windows called Deployment Image Servicing and Management (DISM) to service the setup image. Next, create a folder (e.g. D:mounted_wim) where you’re going to mount the install.wim file using DISM.
- Usually, an official Windows ISO image contains multiple SKUs (commonly referred to as “editions”), such as Home, Professional, Education, etc. Each of these editions has its own index number in the install.wim. Hence, we must determine the index number of the target edition you will be deploying in the future using this image. Use the following command in Command Prompt to find the index number:
dism /get-imageinfo /imagefile:- Replace the value of the /imagefile parameter with the actual path for “install.wim” file within the extracted ISO folder, as in the example: dism /get-imageinfo /imagefile:"D:Win11ISOsourcesinstall.wim"
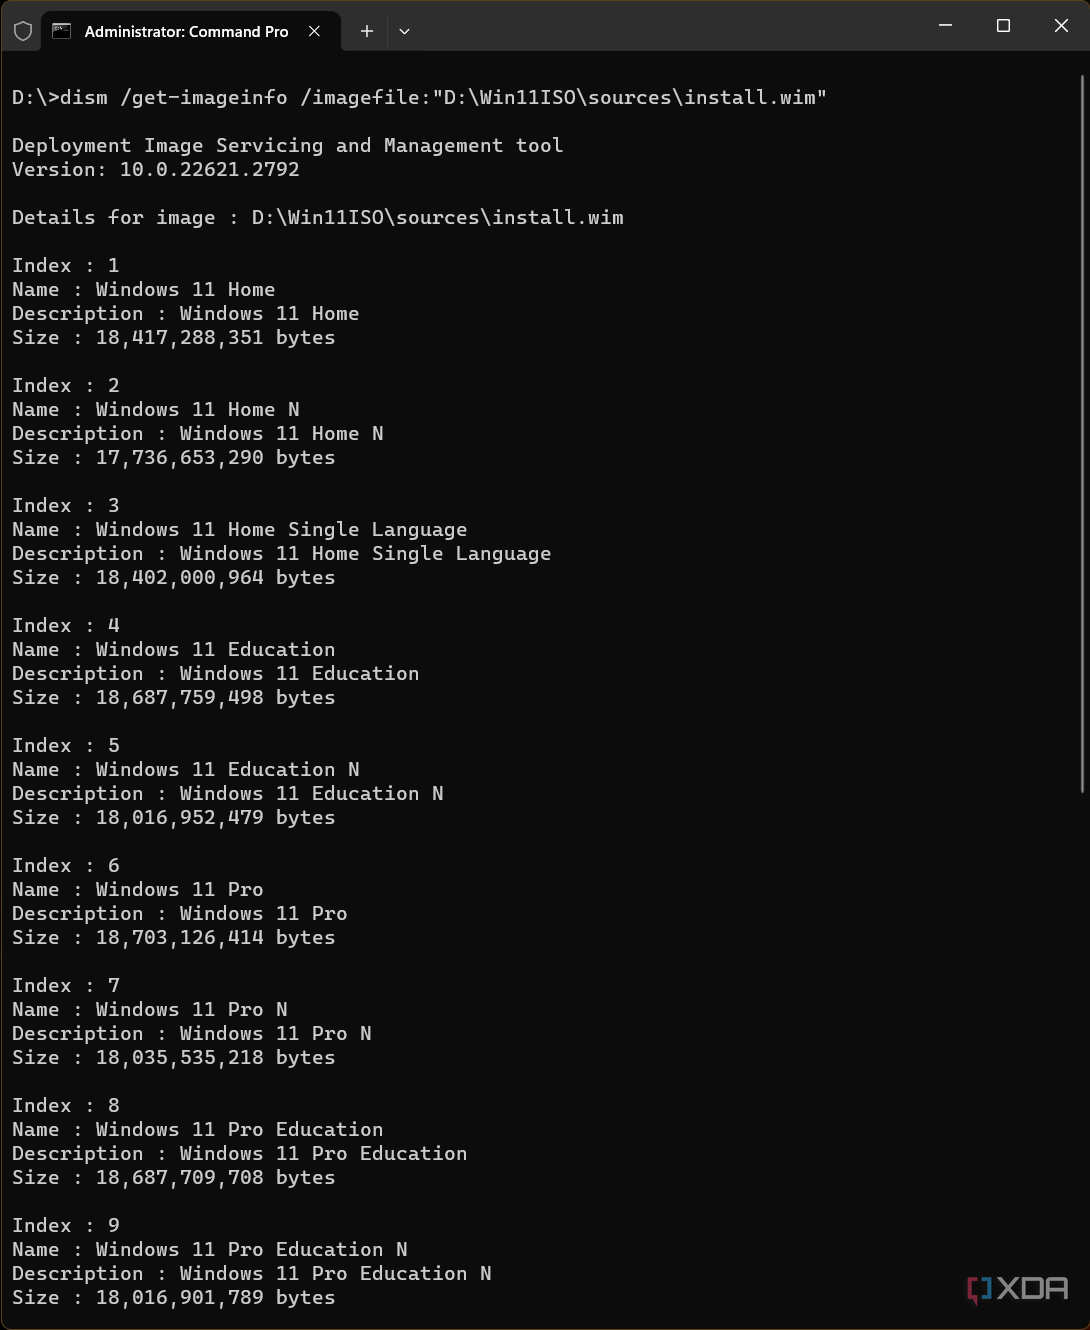
- The result will help you identify the desired index number. For instance, if you plan to deploy the Windows 11 Pro SKU, opt for the associated index number, which is 6 in this case.
- Replace the value of the /imagefile parameter with the actual path for “install.wim” file within the extracted ISO folder, as in the example: dism /get-imageinfo /imagefile:"D:Win11ISOsourcesinstall.wim"
- Now use the following command to mount the specific index of the install.wim file to the folder you created in step 8:
dism /mount-wim /wimfile:<Full path of the install.wim> /index:<Desired index number> /mountdir:<Full path of the mount folder location>- Set the parameter values as necessary. For example: dism /mount-wim /wimfile:"D:Win11ISOsourcesinstall.wim" /index:6 /mountdir:"D:mounted_wim"
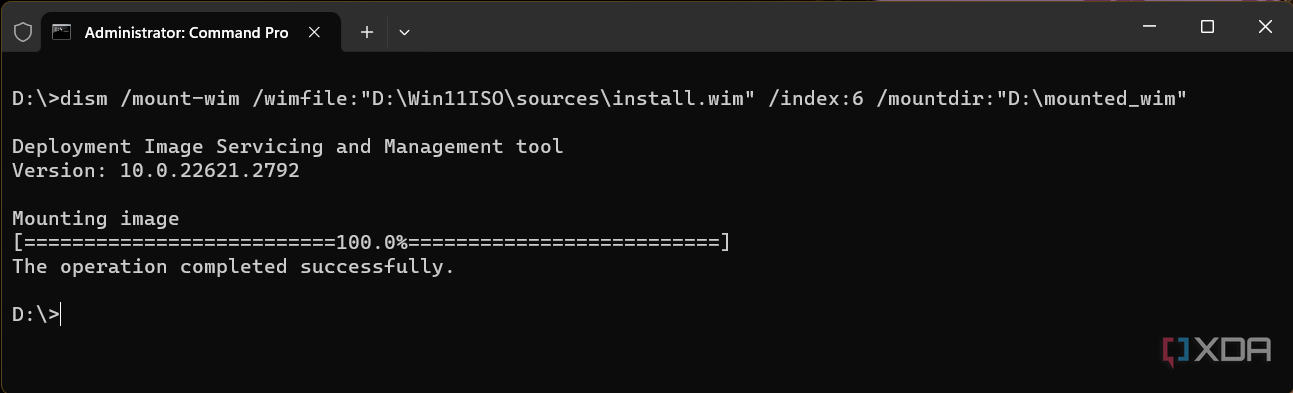
- Set the parameter values as necessary. For example: dism /mount-wim /wimfile:"D:Win11ISOsourcesinstall.wim" /index:6 /mountdir:"D:mounted_wim"
- Add the downloaded Windows update packages to the mounted WIM index using the command below:
dism /add-package /image:<Full path of the mount folder location> /PackagePath:<Full path of the folder where you stored the update packages in step 5>- We will be using the following command for our test scenario: dism /add-package /image:"D:mounted_wim" /PackagePath:"D:23H2_updates"
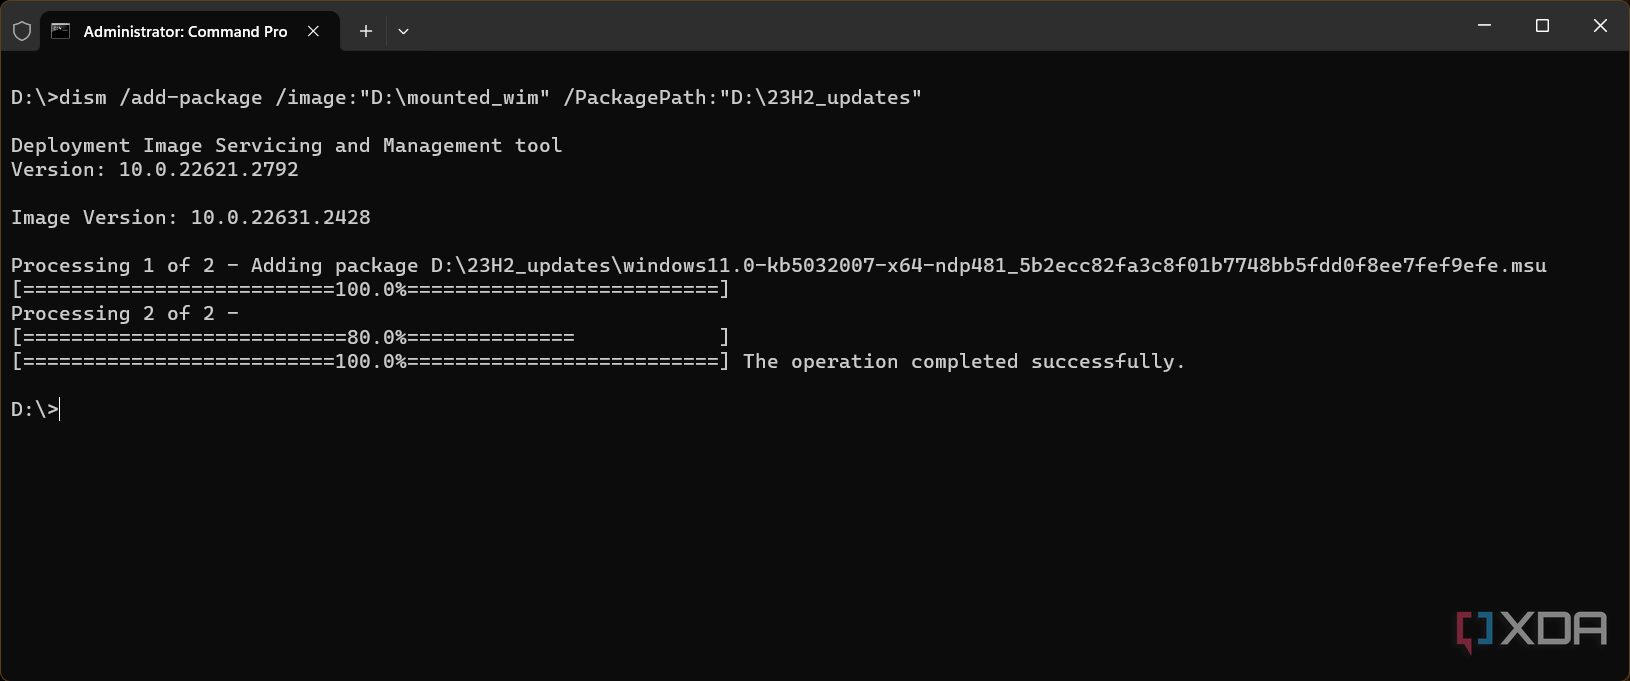
- We will be using the following command for our test scenario: dism /add-package /image:"D:mounted_wim" /PackagePath:"D:23H2_updates"
- The integration phase may take several minutes, depending upon the CPU power and the number of the updates. Wait for the slipstreaming process to finish, then move to the next step.
- (Optional, but recommended) Verify that the newly integrated packages appear correctly:
dism /image:<Full path of the mount folder location> /get-packages- Here’s the output of the command after a successful integration event: dism /image:"D:mounted_wim" /get-packages
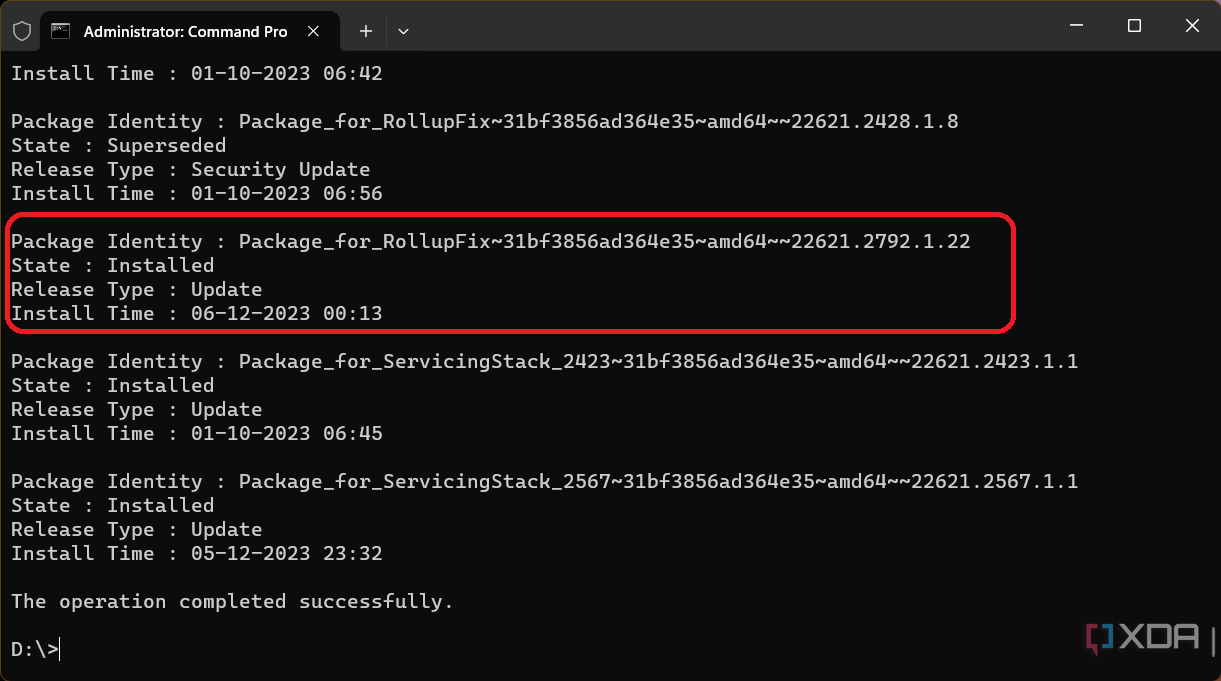
- Here’s the output of the command after a successful integration event: dism /image:"D:mounted_wim" /get-packages
- Use the command given below to save the changes and unmount the image:
dism /unmount-wim /mountdir:<Full path of the mount folder location> /commit
In our case, the command should be: dism /unmount-wim /mountdir:"D:mounted_wim" /commit
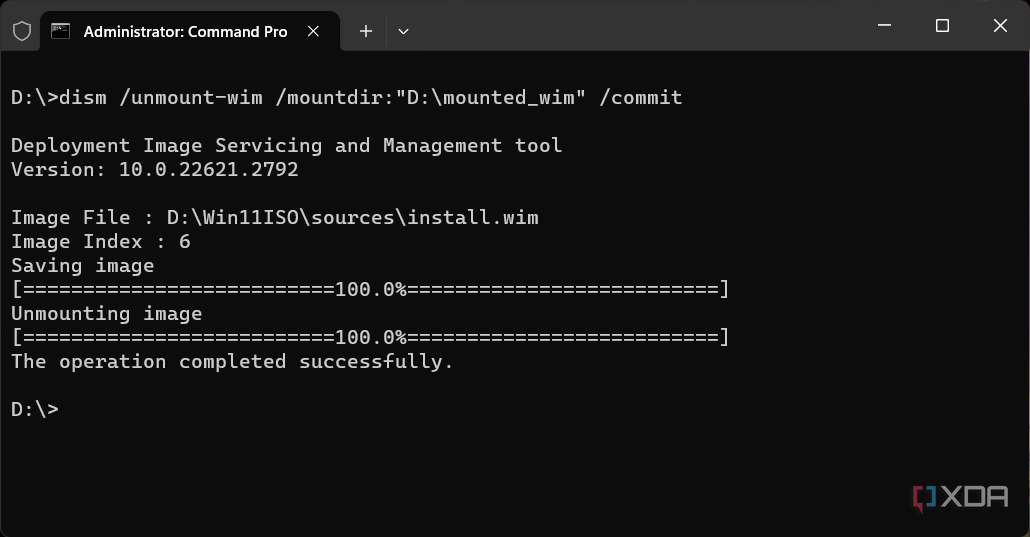
- Note that the console Command Prompt may look like it is stuck during this commit stage. However, that is not the case. Please allow a few minutes to commit and dismount successfully.
- If everything goes right, DISM will apply the changes that you’ve made, save the image, and unmount it. Your local mount folder should now be empty.
- Congratulations! You’ve successfully slipstreamed latest updates to your Windows 11 setup source.
At this point, you can safely delete the D:mounted_wim and D:23H2_updates folders.
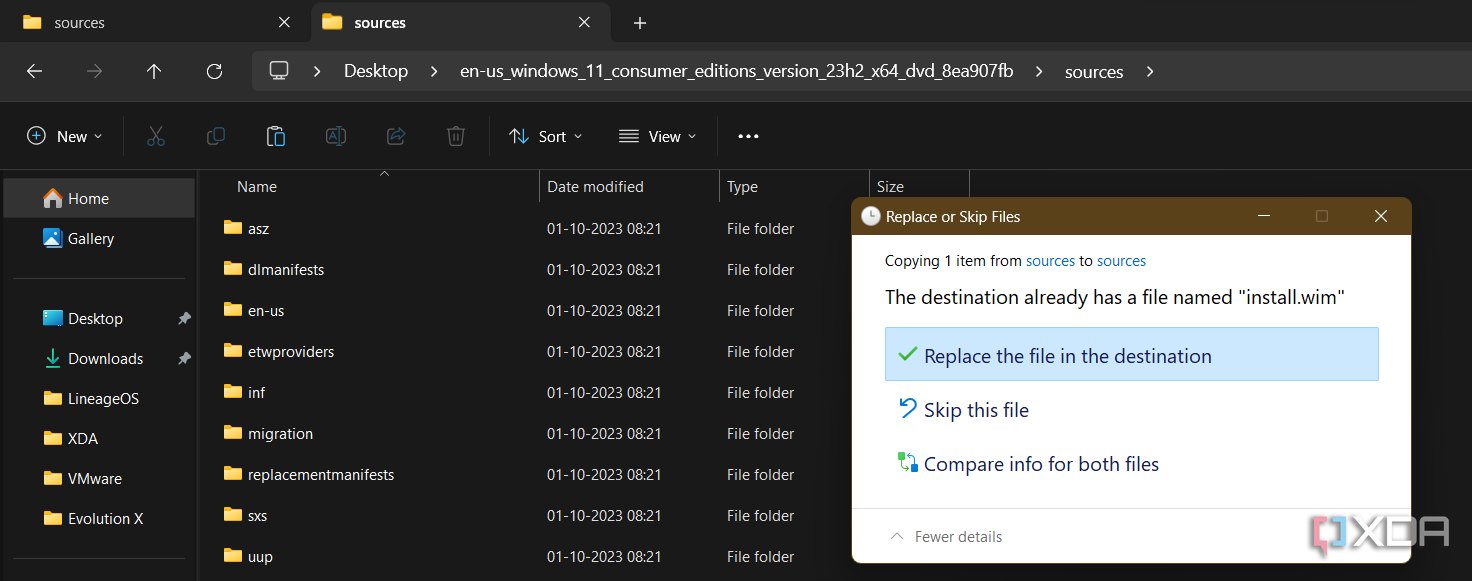
If you prefer installation via bootable USB flash drives, then simply replace the stock install.wim file with the updated one you just created under D:Win11ISOsources. Then deploy the patched image to a test PC/VM and fire up Windows Updates to check for any available updates. You will definitely notice a drastic reduction in the list.
In case you want to repack the extracted ISO contents along with the updated install.wim to a standalone ISO file, you can do so using Microsoft’s own Oscdimg utility. Several third-party alternatives exist as well.
Keep in mind that we updated only a single index of the install.wim file. It is possible to create a batch script to do the same thing for every other index, or even export only a handful of SKUs after a successful slipstreaming, but such operations are beyond the scope of this tutorial.
You can slipstream updates into the Windows 10 ISO in a similar fashion. However, integrating ESU updates will require additional steps.
Summary
This was all about the update slipstreaming process for Windows 11. Some people might find it easier to opt for Windows Update than to update an existing ISO. Well, this is XDA, which means our readers always look at the big picture.
With a significantly smaller download volume and the availability of all the latest security updates out of the box, updating the Windows installation ISO image is not only a speedy solution, it also eliminates the headache of updating each separate computer later on. The various DISM commands can be a bit confusing at first, but the chances are that once you’ve fiddled around the guide a little, you won’t need to tinker with them again for quite some time.
** (Disclaimer: This video content is intended for educational and informational purposes only) **
More...