 Tweet
Tweet
You’ll need to be an administrator to turn off Microsoft-Verified apps in Windows 11.
Is it safe to turn off Microsoft-verified apps?
Generally, if you’re downloading apps from trusted places like the Microsoft Store or websites that host legitimate files, disabling Microsoft-verified apps should be alright. You won’t run into any visible issues turning it off, either. The feature is mainly enabled as a security feature for novice users, but you can turn it off with little risk to your PC. However, if you share your PC with seniors, children, or others who might not know how to check if a source is legitimate, you might want to keep it on.
How to turn off Microsoft-Verified apps through the Settings app
As with most things, you can take a trip to the Windows 11 Settings app to turn off Microsoft-Verified apps.
- Open the Settings app by hitting Windows + I.
- Click Apps in the sidebar of the Windows 11 settings app.
- Click Advanced App Settings.
- Head to the Choose where to get apps dropdown menu and select where you plan on installing apps from.
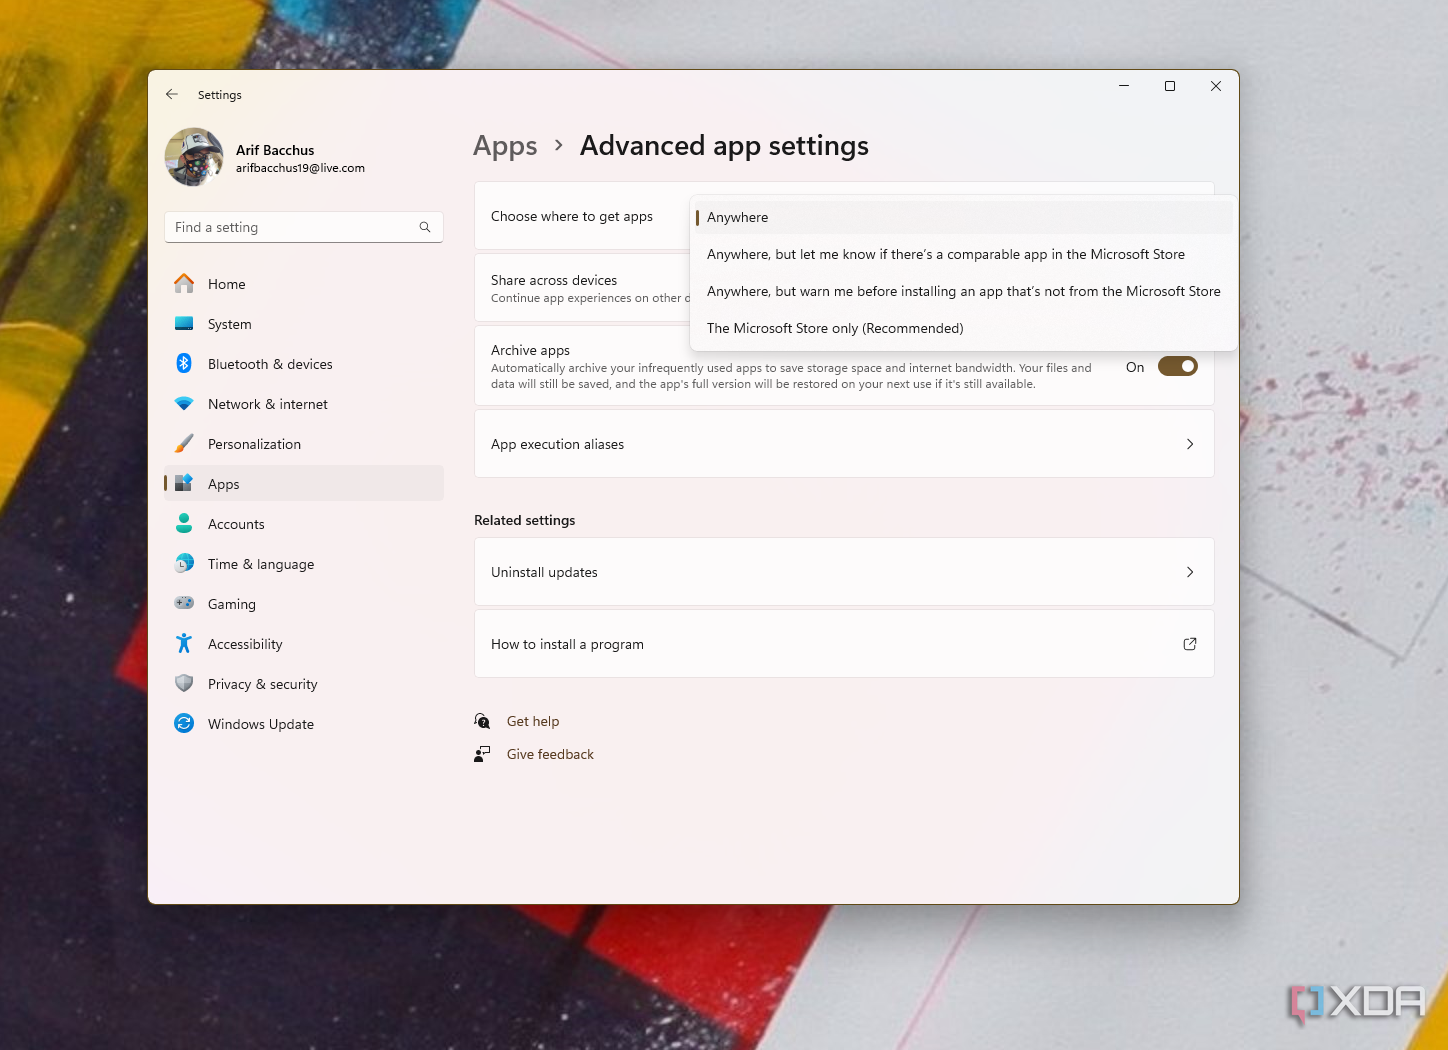
- Select Anywhere to turn off Microsoft-Verified completely.
That’s it! Once you’re done, you’ll be able to install apps from anywhere, including the Microsoft Store and traditional EXE files. No restart is required.
If you want to re-enable some limits, you can always enable the feature by clicking back through the steps above and choose the option for Anywhere, but warn me before installing an app that’s not from the Microsoft Store. If you don’t see these options, you can try the other methods below.
How to turn off Microsoft-Verified apps through the Command Prompt
If you’re having issues with these settings options, you can also open Command Prompt as an administrator and run the following line of code. Be warned that this method will edit the registry. So, it’s not for those who aren’t system administrators.
- Search for CMD from the Start Menu.
- Choose Run as administrator.
- Paste the following code in and press Enter:
reg add HKEY_LOCAL_MACHINESOFTWAREMicrosoftWindowsCurrentV ersionExplorer /v AicEnabled /t REG_SZ /d Anywhere
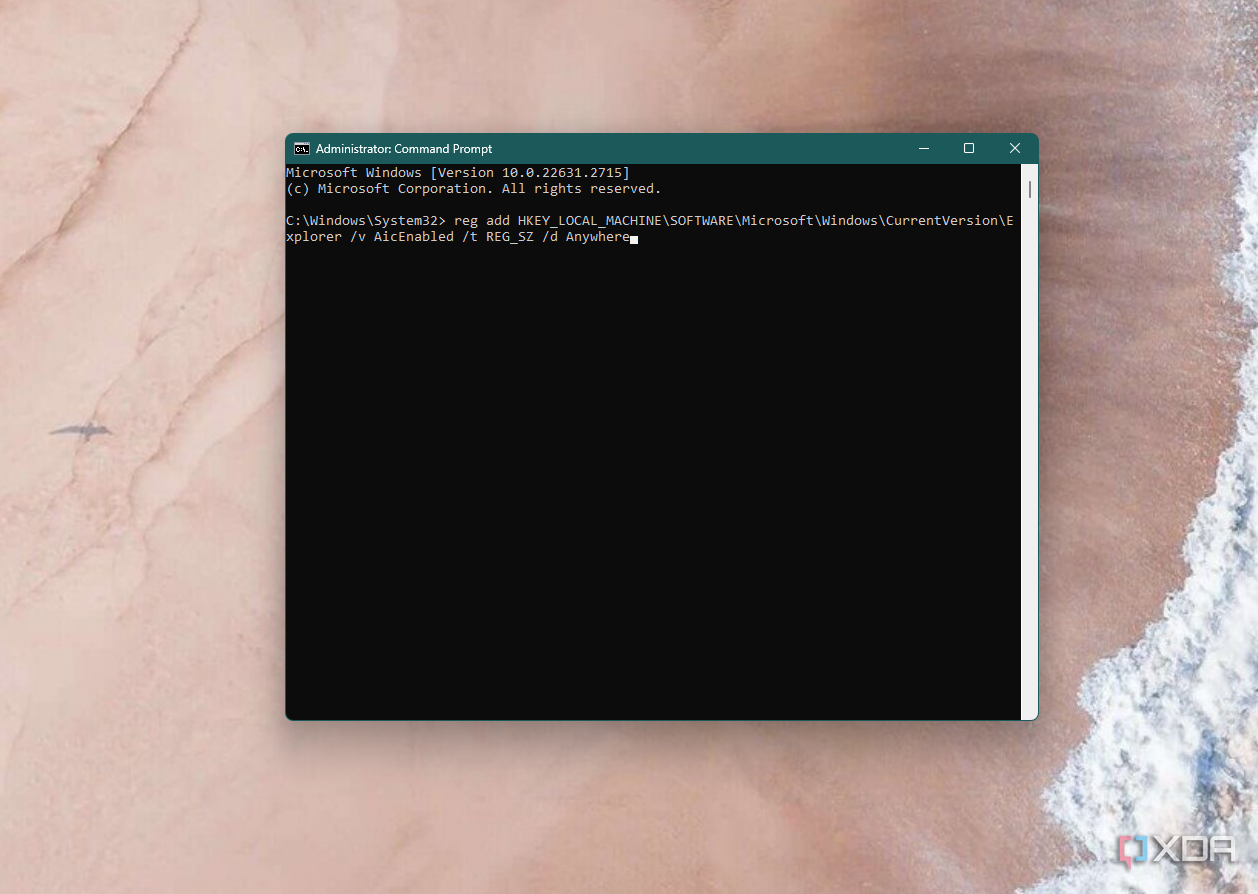
With his method, you might have to reboot your PC for the changes to take effect. Once restarted, you should be able to install the app that was giving you issues earlier.
How to turn off Microsoft-Verified apps through the Group Policy Editor
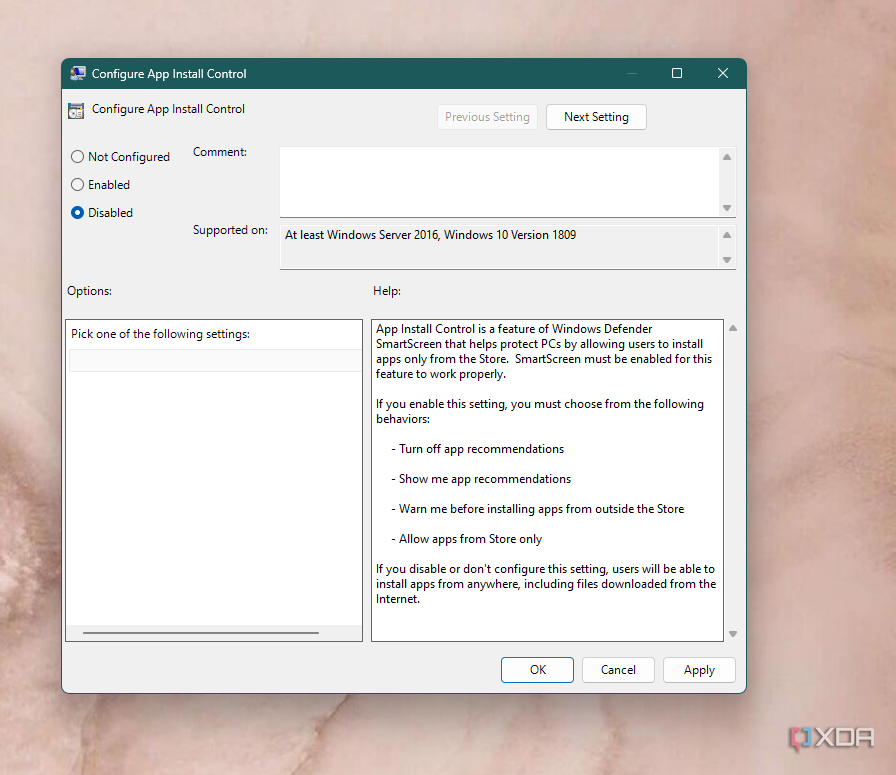
We also have a method reserved for those running Windows 11 Pro. If you’re running this version of the operating system, you can turn off Microsoft-Verified apps through the registry editor. It accomplishes the same task as the other methods but is a bit more sophisticated.
- Open a Run dialogue with Windows + R.
- Enter the command:
gpedit.msc

- Navigate to the following path using the sidebar: Computer Configuration > Administrative Templates > Windows Components > Windows Defender SmartScreen > Explorer.
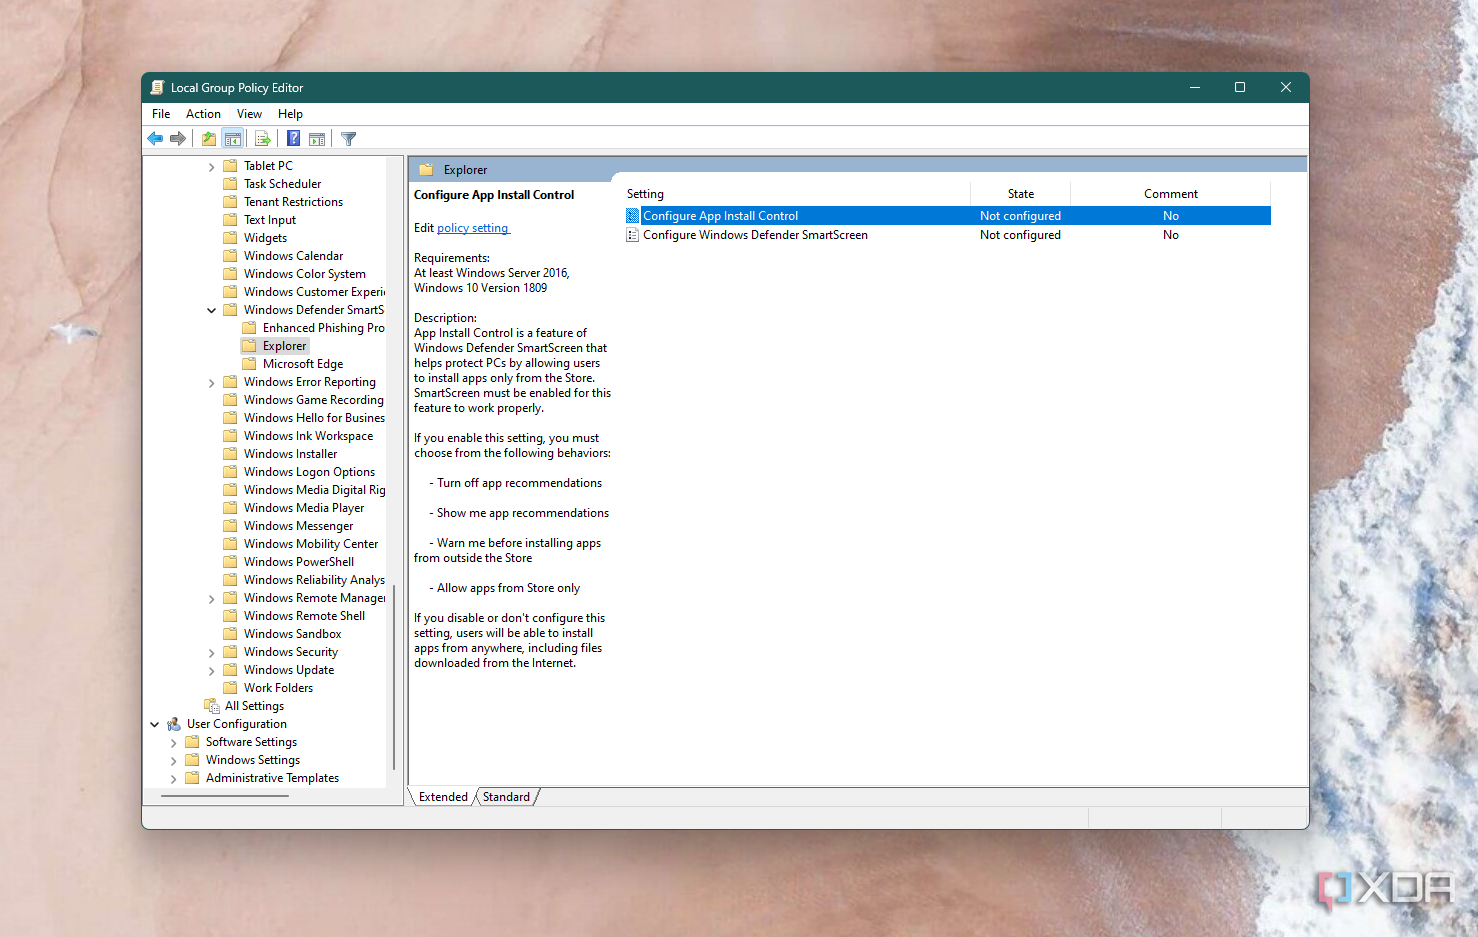
- Double-click on the option for Configure App Install Control.
- Select Not Configured or Disabled, and then press OK.
How to turn off Microsoft-Verified apps through the Registry Editor
If you want to turn off Microsoft-Verified apps using the Registry Editor, you’ll have to dive deep into registry settings. We don’t suggest going this route, as you risk damaging your PC if you change the wrong setting.
- Search for Registry Editor in the Start Menu and click the top result.
- Navigate to the following path using the sidebar:
HKEY_LOCAL_MACHINE>SOFTWARE>MicrosoftWindows/CurrentVersionExplorer - In the panel to the right, double-click on AicEnabled.
- Change the value to Anywhere.

- Click OK.
Reboot your PC for the change to take effect.
You’re finished! That’s all there is to turn off Microsoft-Verified apps in Windows 11, so you should be able to get up and running with your favorite app. Remember, Microsoft also just released the Windows 11 23H2 update, which is packed with tons of new features that can help you run your favorite apps better.
** (Disclaimer: This video content is intended for educational and informational purposes only) **
More...